This is not just a food blog, but it has plenty of spice

Menu

Skip to content
  • Home
  • About
  • Freebies
  • Projects
  • Recipes
  • Contact

Month: October 2013

Sister Inspirations: Five Non-Traditional Painted Pumpkins

10 / 21 / 135 / 5 / 15

Welcome to the second installment of Sister Inspirations. This month we felt compelled to take a nod from the season and decorate pumpkins. We realize that there aren’t many new ideas that haven’t been done before, so we put our own flair on a few “non-traditional” pumpkin designs.

We went with painted pumpkins because they last longer and they are not Halloween specific, so you can use them through Thanksgiving. Also, they tend to be more kid-friendly than wielding sharp tools to carve a pumpkin.

I ended up designing a polka-dot glitter pumpkin, a bold crosshatch pumpkin and a white and plum ombre pumpkin.

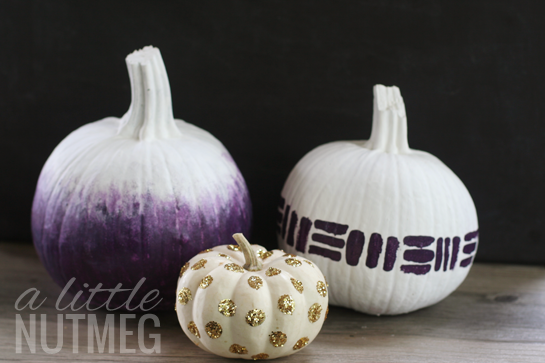
Glitter Polka Dot Pumpkin

I loved how glamourous this little pumpkin turned out. It makes me happy and smile every time I look at it. It’s such a perfect little pumpkin.

I just bought those little glue dots and stuck them on the pumpkin randomly. After I sprinkled a little glitter over each dot, I patted them down to make sure they stick. You can get glue dots in almost every craft store or places like Target and Walmart.  This polka-dot glitter pumpkin was super easy to make. This design in particular would be a great project for kids.

Crosshatch Patterned Pumpkin

My sister, Amy, and I were getting supplies at Target when I saw this crosshatch pattern on a white flower pot. I instantly thought it would translate gorgeously to a pumpkin.

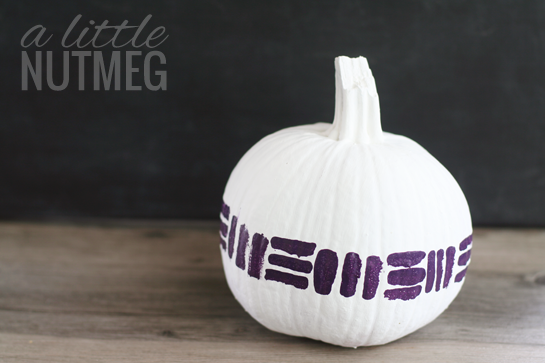
First, I painted the pumpkin white then I used the end of a small sponge brush to create the pattern.

Ombre Pumpkin

I just love ombre. It’s a trend that I never tire of seeing. Plus it was a good way to inject some bold color into my fall tablescape. 

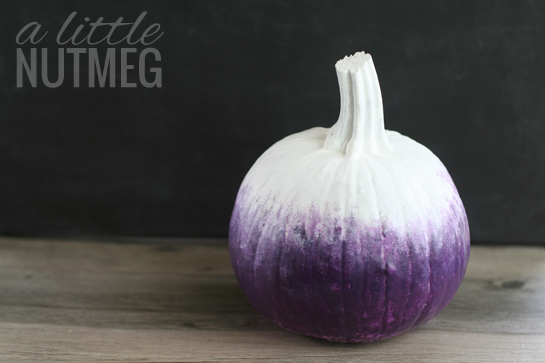
For this ombre pumpkin, I started with a white base coat, then painted to bottom part plum. I put a second coat of white on the top and while the paint was still slightly wet, I used a damp cotton ball to blend the colors.

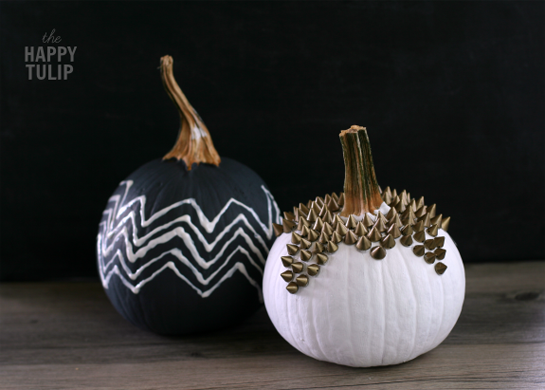
Amy also decorated two awesome pumpkins on her blog, The Happy Tulip. Her studded pumpkin is such an edgy little pumpkin. I’m in love with it. Check out her irregular chevron patterned one, as well. They both have pretty dramatic results.

Leave a comment

Free iPhone Wallpaper: October Edition

10 / 17 / 135 / 5 / 15

Fall is my favorite time of year. In the Midwest, the weather is perfectly crisp but not too cold. I also happen to love C.S. Lewis. So I combined my two loves for this months’ iPhone wallpaper. This time I designed it so you don’t need a different version for iPhone 4 and 5. Just click on the link below and save the image.

Enjoy the change in weather. Enjoy the beauty of the season. Enjoy the journey. Oh, and enjoy my wallpaper to help remind you to do all that.

Download: iPhone wallpaper

Leave a comment

Photography tutorial: Silhouettes

10 / 10 / 135 / 5 / 15

I have always been fascinated by silhouette photography. So much can be shown about the subjects when only their outline is visible. Like the picture above of my Great Dane, Bella. Her majestic silhouette hints at the nobility of the breed. Attentive, protective, alert. That is my Bella. She also happens to be goofy, klutzy and sassy. That can be showcased below in the picture of Bella tussling with her brother, Beau.

I was inspired by our own engagement pictures taken by the very talented Megan Rogers from Over the Rainbow Wedding Photography. The Over the Rainbow Wedding photography duo, Megan and Sarah Long are both fantastic photographers and I am often inspired by their work. The photos below were snippets from our engagement photoshoot.

Basic Silhouette Tips:

1. Back lighting is key in creating silhouettes. Your subject must be between you and your light source. In this case, the setting sun was behind my dogs. 
2. Dusk is the best time of day to shoot silhouettes. The time period right before the sun sets creates a nice back light and of course produces gorgeous background colors.
3. No Flash. It must be turned off. Your flash will fill in the silhouettes and ruin the effect.
4. Open skyline. You want there to be contrast between your dark subject and the lighter background. Unless your subject is a line of trees or the silhouette of buildings, open spaces work better. 
5. Get low. You see more of your subject the lower your get. More sky = more subject. But play around with it. I was on my stomach for the photos of the dogs. 
6. Focus directly on your subject.

For the more Advanced: 

1. Higher aperture. This will allow the background to be sharp, as well as the subject. 
2. Shutter Speed. You will most likely need a slower shutter speed because of the time of day. But play around with it.
Let me know if you found this tutorial helpful or if you have any questions. You don’t need to know manual mode to take silhouette photos but it does help. So get out your camera’s manual and learn about shutter speed, aperture and ISO. It has already helped my photography immensely. So have fun playing around with the silhouette effect and I hope this post challenges you to be creative and continue learning. Peace out.
Leave a comment

Adventures in Blogging: a behind the scenes look into a blogging photo shoot

10 / 3 / 135 / 5 / 15
I’ve had a few friends ask me about the details of blogging. With this in mind, I thought I would share a behind the scenes look into what goes into a blog photo shoot. My boozy apple cider recipe with salted caramel whipped cream was my first “big” blog project so that photo shoot are what all these pictures are from.  

I am a messy cook. Actually, in general I tend to be a messy person. My mother is always frustrated with me when she comes over to my house while I am cooking. She wipes up little spills from the counter, and puts up ingredients when I am done with them. She insists upon a clean workspace. I get it. I totally respect that she has that ability. But I definitely don’t have the same ability. Sorry Mom, I know you tried. But, enjoy my mess and my sneak peak into what starting a blog entails.
My sister, Amy and I jerry-rigged a sheet as a white backdrop for our photos. The duct tape held just long enough for us to take pictures, then it started to fall down. We had many objects on the table that we played around with until we were satisfied with each finished scene.

Amy and I laughed a lot during this shoot. Sometimes we broke down into a little silliness, including a photobombing crocodile named “Moto.” We had fun. Which I think is one of the keys to the whole blogging thing. Learning new things and having fun are the reasons I started blogging in the first place anyway.

Leave a comment
I'm glad you're here!
Facebook profile twitter profile email me email me twitter profile rss feed

Search this blog

Recent Posts

  • Free Valentine’s Day iPhone Wallpaper
  • Top 5 iPhone Wallpapers from 2014
  • Christmas Glitter iPhone Wallpaper
  • Free Printable Christmas Gift Tags {Sister Inspirations}
  • Two Coconut Milk Ice Cream Recipes {Sister Inspirations}

Archives

  • February 2015
  • January 2015
  • December 2014
  • November 2014
  • October 2014
  • September 2014
  • August 2014
  • July 2014
  • June 2014
  • April 2014
  • March 2014
  • February 2014
  • January 2014
  • December 2013
  • November 2013
  • October 2013
  • September 2013
  • August 2013
Site made with ♥ by Angie Makes